How to Set Up a Chocolate Fountain Outdoors
There’s something undeniably magical about a chocolate fountain, especially when it’s set up outdoors. Whether you’re hosting a birthday party, wedding, or just a fun gathering with friends, a chocolate fountain adds a touch of whimsy and decadence that everyone loves. Picture it: sweet, flowing chocolate cascading down in a glorious waterfall, ready to coat whatever treats you can dream up. If you’ve been itching to create this experience outside, here’s a guide to help you set up a chocolate fountain that will have your guests swooning with delight!
Choosing the Perfect Spot for Your Outdoor Fountain Fun
Finding the right location is crucial for a successful outdoor chocolate fountain experience. Look for a flat, stable surface where you can set up your fountain. A picnic or dining table works perfectly, but make sure it’s sturdy enough to hold the weight of the fountain and the chocolate. You want to avoid any embarrassing spills or accidents, especially when chocolate is involved!
Next, consider the environmental factors such as sunlight and wind. Direct sunlight can cause the chocolate to melt too quickly and become unmanageable, while a gusty breeze might lead to chocolate splatters everywhere. Ideally, choose a shaded area, perhaps under a gazebo, patio, or large umbrella. This will help maintain a consistent temperature for your chocolate, ensuring it flows smoothly throughout your gathering.
Lastly, think about the accessibility for your guests. Make sure the fountain is easy to reach and that there’s enough space for everyone to gather around without feeling cramped. Good visibility is essential too, as you want your guests to admire the fountain and get excited about dipping their treats into that luscious, flowing chocolate!
Essential Equipment to Make Your Chocolate Dreams Come True
Setting up a chocolate fountain isn’t just about the fountain itself; you’ll need a few essential items to ensure everything runs smoothly. First and foremost, you need a quality chocolate fountain. Look for one that has adjustable heat settings and a sturdy base. The size will depend on the number of guests, but generally, a fountain holding 2-4 pounds of chocolate should suffice for most gatherings.
Next, you’ll need plenty of chocolate! Opt for chocolate specifically formulated for fountains, as it has a lower viscosity and melts more evenly. You can choose milk, dark, or white chocolate—consider incorporating a mix for variety! You may also want to have a few extra bags on hand, just in case your guests can’t resist going back for seconds or thirds.
Don’t forget about the dipping skewers! Wooden or metal skewers work great for this. You might want to have a few different lengths—shorter ones for smaller treats and longer ones for larger items. Additionally, keep some plates and napkins handy, as well as a tablecloth to protect your surfaces from any potential mess. With the right equipment, you’ll be well on your way to creating a chocolate-lovers paradise!
Melting Chocolate: Tips for the Best Fountain Experience
Now that you’ve got your spot picked and your equipment ready, it’s time to melt that chocolate! The key to a successful chocolate fountain is to ensure your chocolate reaches the perfect consistency. Start by melting your chocolate using a double boiler or microwave. If using a microwave, heat in short bursts of 30 seconds, stirring in between, to avoid burning it. The melted chocolate should be smooth and pourable—if it’s too thick, you can add a little vegetable oil or cocoa butter to thin it out.
Once your chocolate is melted, it’s time to pour it into the fountain. Make sure the fountain is preheated for a few minutes before adding the chocolate; this will help maintain an even flow. Start pouring slowly, allowing the chocolate to coat the auger before it begins cascading down the tiers. If you notice the flow isn’t quite right, don’t hesitate to adjust the temperature settings until it’s just right.
Monitoring the fountain throughout the event is also essential. If you notice the chocolate starting to cool and thicken, simply reheat it in the microwave or on the stove for a few seconds. Keeping a close eye ensures that your fountain remains a delicious centerpiece throughout the celebration, so everyone can enjoy that perfect dip every time!
Sweet Treats: Dipping Ideas to Delight Your Guests!
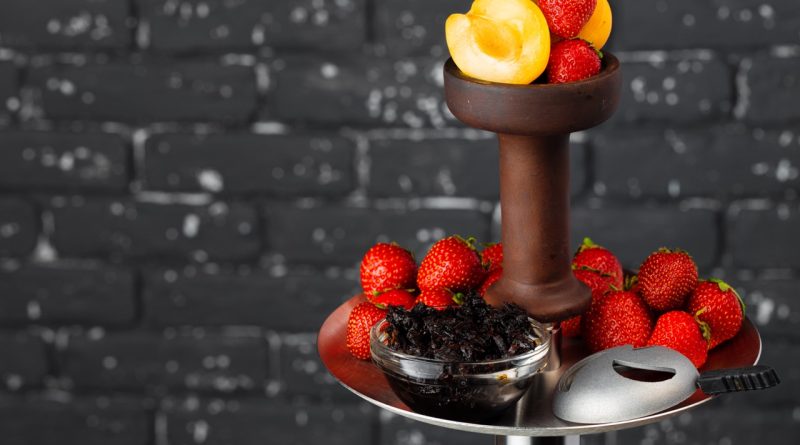
With the chocolate fountain flowing, it’s time to plan some drool-worthy treats for your guests to dip! Classic options like fresh strawberries, marshmallows, and pretzel sticks are always crowd-pleasers. The combination of fresh fruit and rich chocolate is simply heavenly, while the salty crunch of pretzels offers a delightful contrast. You might even consider offering some skewered fruits for easy dipping!
For a more adventurous twist, think outside the box! Mini donuts, rice crispy treats, or even chunks of cake can be great options. Imagine a bite-sized brownie or a piece of creamy cheesecake dipped in warm chocolate—pure indulgence! You can also provide a variety of cookies; chocolate chip, Oreos, or even biscotti will elevate the experience.
Lastly, don’t forget to cater to different tastes and dietary restrictions. Have some gluten-free options available, such as fruit or gluten-free cookies, and consider offering a vegan chocolate option for those who prefer it. The key is to create a smorgasbord of delicious treats that appeal to every taste, ensuring your chocolate fountain becomes the star of the show!
Setting up a chocolate fountain outdoors can turn any gathering into a decadent celebration. By carefully choosing your location, gathering the right equipment, mastering the art of melting chocolate, and providing a tantalizing array of treats, you’ll create an unforgettable experience for your guests. So, roll up your sleeves, gather your friends, and get ready to indulge in a sweet adventure that’ll leave everyone with smiles on their faces and chocolate on their fingers!