How to Make a White Chocolate Fountain
A white chocolate fountain is a show-stopping centerpiece that elevates any gathering, from birthday parties to wedding receptions. The allure of cascading warm, velvety white chocolate invites guests to indulge in a delightful dipping experience. Whether you’re a seasoned host or a first-time party planner, this guide will walk you through the process of creating your own white chocolate fountain. So, roll up your sleeves and prepare for a sweet adventure!
Gather Your Supplies: What You’ll Need for a Fountain Fun
To kick things off, you’ll need to gather your supplies. The centerpiece of your fountain is, of course, the white chocolate itself. You can use premium white chocolate chips or melting wafers, which are specifically designed for melting and flowing beautifully through the fountain. Aim for around 3 to 5 pounds, depending on the size of your fountain and the number of guests you’re expecting.
Next, your fountain is an essential piece of equipment. If you don’t have one, they can easily be rented or purchased from party supply stores. Make sure to check the size and capacity so it can accommodate your melted chocolate. Additionally, gather any necessary tools, like a microwave-safe bowl for melting, a rubber spatula for stirring, and a serving tray for your dipping items.
Lastly, think about the dipping delights you’ll want to provide. Fruits like strawberries, bananas, and pineapple wedges pair perfectly with white chocolate, as do marshmallows, pretzels, and cookies. Having an assortment of items will make sure there’s something for everyone, and it adds a fun visual element to your setup.
Melting White Chocolate: Tips for the Perfect Consistency
Once you’ve gathered everything, it’s time to melt the white chocolate. Start by measuring out your chocolate—remember, the quality can impact taste and flow, so don’t skimp here! If you’re using chocolate chips, you can melt them directly in the microwave. Place them in a microwave-safe bowl and heat in short bursts of 15-30 seconds, stirring between intervals until completely melted. This gradual warming prevents the chocolate from seizing up or burning.
If you prefer the stovetop method, use a double boiler. Fill the bottom pot with water and place the chocolate in the top pot, stirring continuously as the water simmers beneath. This method provides more control over the temperature and can produce a smoother melt. Regardless of your melting method, you can add a small amount of vegetable oil or paramount crystals to thin out the chocolate, ensuring it flows seamlessly through the fountain.
After your chocolate is perfectly melted and has reached a smooth consistency, it’s essential to keep it warm. If the chocolate cools too much before pouring it into the fountain, it will harden and won’t flow correctly. If necessary, you can keep it warm in the microwave or on a low heat setting until you’re ready to set up the fountain.
Setting Up Your Fountain: A Step-by-Step Guide
With your chocolate melted and ready to go, it’s time to set up your fountain. Start by finding a stable, flat surface where the fountain can be securely placed. Make sure there’s a power outlet nearby, as most fountains require electricity to operate. Once you’ve found the perfect spot, carefully assemble the fountain according to the manufacturer’s instructions.
After assembling, pour the melted white chocolate into the fountain’s base. Make sure to fill it up to the recommended line, allowing enough room for the chocolate to flow without spilling over. Turn on the fountain to get the chocolate moving; you might need to give it a gentle stir to help it start flowing evenly.
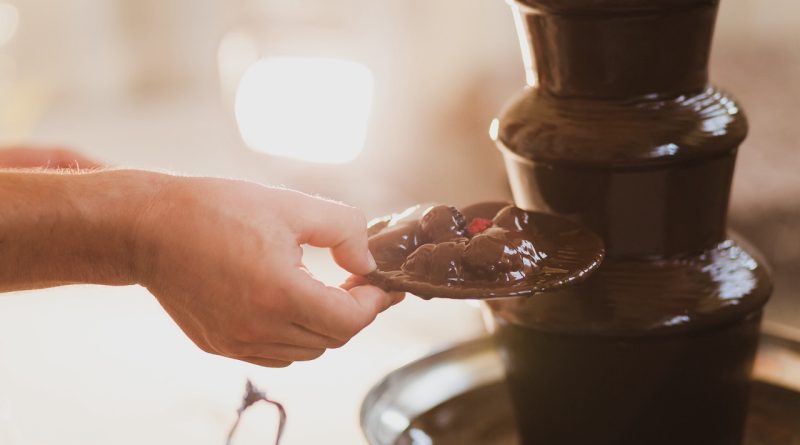
While the fountain begins to flow, don’t forget to prepare your dipping station! Arrange your fruits, snacks, and treats on platters near the fountain. This setup not only enhances accessibility but also encourages your guests to get involved and start dipping right away. The bubbling white chocolate will entice everyone to indulge, making it a fun and interactive experience.
Dipping Delights: What to Serve with Your Chocolate Fountain
Now that your fountain is set up and flowing, it’s time to think about what to dip! Fresh fruits are a classic choice; strawberries and bananas are always crowd-pleasers. You might also consider adding some tropical flair to your spread with pineapple chunks or mango slices. The juicy, natural sweetness of the fruit contrasts beautifully with the creamy white chocolate, creating a delightful combination.
For those looking for something a little different, consider savory options like pretzel rods or potato chips. The salty crunch of pretzels provides an exciting contrast to the sweet chocolate, making for a unique flavor experience. You can also include items like graham crackers, biscotti, or mini donuts for a fun variety of textures and tastes.
Don’t forget about the dippers! Set out skewers or toothpicks to help guests grab their selected treats effortlessly. You can also provide small bowls of toppings, like crushed nuts, sprinkles, or coconut flakes, allowing guests to customize their creations. This interactive element adds an extra layer of fun to your chocolate fountain experience, ensuring everyone leaves with a sweet memory.
Setting up a white chocolate fountain may sound intimidating, but with the right supplies and a little know-how, it can be an easy and rewarding experience. From melting the perfect chocolate to curating a delicious selection of dipping treats, the joy of seeing your guests light up as they dip into the flowing fountain is worth the effort. So, embrace the chocolatey goodness and enjoy the sweet moments that come with it—your next gathering will surely be one to remember!