How to Create a DIY Chocolate Fountain Using Kitchen Items
Who doesn’t love the sight of warm, cascading chocolate? A chocolate fountain can elevate any gathering, transforming simple desserts into a delightful experience. But what if I told you that you can create your very own DIY chocolate fountain using items you already have in your kitchen? This guide will take you through the essentials, step-by-step instructions, and helpful tips to ensure your chocolate fountain is the star of the show. So, roll up your sleeves, and let’s get started on your chocolate adventure!
Gather Your Kitchen Essentials for a Chocolate Dream
Before diving into the construction of your chocolate fountain, it’s essential to gather all necessary items. Start with a heat-proof bowl or a small pot that will serve as the base for your fountain. You’ll also need a sturdy stand—this can be a tiered cake stand, a large bowl inverted at the bottom, or even a colander, depending on what you have at home. Make sure the stand is stable enough to support the bowl filled with chocolate, as you don’t want a chocolate disaster on your hands!
Next, choose your chocolate wisely. You can use chocolate chips, bars, or even couverture chocolate, which is known for its high cocoa butter content. If you want to be adventurous, consider mixing in some flavored chocolate or even adding a pinch of salt to enhance the sweetness. Along with chocolate, pick your dippers: strawberries, marshmallows, pretzels, and fruit slices are all delicious options. The more, the merrier!
Lastly, don’t forget some tools to assist in your chocolate fountain creation! You’ll need a microwave or double boiler for melting the chocolate, measuring cups, a spatula for stirring, and skewers or toothpicks for dipping. With these essentials in hand, you’re all set to embark on this sweet project.
Step-by-Step Guide: Building Your Own Chocolate Fountain
To kick off your DIY chocolate fountain, start by melting the chocolate of your choice. If you’re using a microwave, place the chocolate in a heat-safe bowl, microwaving in 30-second intervals and stirring in between until smooth. If you’re opting for a double boiler, fill a pot with water, bring it to a simmer, and place your heat-proof bowl on top, allowing the steam to gently melt the chocolate. Keep stirring it until it’s silky and fluid—this is where the magic begins!
Once your chocolate is melted, pour it into the bowl you’ve chosen as your fountain’s base. It’s crucial to ensure that the chocolate is warm enough to flow smoothly but not so hot that it bubbles or splatters. If you’re using a multi-tiered stand, you can pour some chocolate on each tier, creating a multi-layered effect. If you’re using a single bowl, you can add depth by placing a smaller bowl in the center to help distribute the flow.
Now comes the fun part—creating the fountain effect! To achieve this, you’ll need to gently stir the chocolate while it’s still in the bowl, mimicking the flow of a traditional fountain. If you have a handheld mixer, lightly blending the chocolate can help aerate it, giving you that cascading effect. While it won’t be as extravagant as a store-bought fountain, the charm of your homemade version will shine through!
Perfecting the Chocolate: Melting Techniques to Try
The key to a successful chocolate fountain lies in how you melt the chocolate. One technique to try is adding a bit of vegetable oil or coconut oil to your chocolate before melting it. This will not only help achieve a more fluid consistency but also prevent the chocolate from hardening too quickly once it’s poured. Start with a tablespoon of oil per cup of chocolate and adjust to your desired thickness.
If you’re feeling adventurous, you might consider incorporating cream or milk into your melted chocolate. This will create a smoother texture that flows beautifully. Whether you’re using a microwave or double boiler, be sure to mix well until all ingredients are fully combined. This creamy consistency will give you that dreamy, luscious chocolate effect that’s perfect for dipping!
Lastly, keep an eye on the temperature of your chocolate. Too hot, and it may lose its structure; too cool, and it may solidify. Use a candy thermometer to keep the chocolate between 104°F to 113°F (40°C to 45°C) for the best fountain flow. With the right melting techniques, you’ll have a rich and glorious chocolate that’s ready to cascade and delight your guests.
Tips for a Flawless Fountain Experience: Serving & Enjoying!
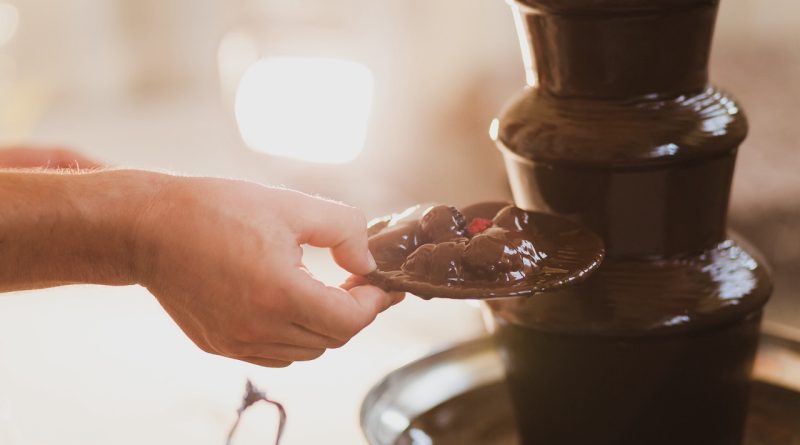
Now that you’ve created your chocolate fountain, it’s time to serve it up! Set the fountain up on a table with ample space for guests to gather around. Surround it with a beautiful arrangement of dippers—a colorful display of fruits, cake pops, and pretzels will entice everyone. Remember to provide plenty of skewers or toothpicks for easy dipping, and don’t be shy about making extra chocolate for refills!
While hosting, encourage your guests to be creative with their dippers. Mixing flavors can elevate the experience! For instance, try dipping a salty pretzel in warm chocolate and then sprinkling it with sea salt for a sweet-and-salty treat. Or, pair fresh strawberries with a drizzle of white chocolate for an impressive and tasty combination. The key is to let everyone have fun exploring different flavors and textures.
Finally, keep the atmosphere light and enjoyable. Play some upbeat music and engage your guests in conversation while they dip their treats into the flowing chocolate. A DIY chocolate fountain is not just a treat; it’s an experience. With these tips, you’re sure to create a memorable chocolate experience that everyone will be talking about long after the last dip!
Creating your own DIY chocolate fountain is not only a fun kitchen project but also a delightful way to bring people together over sweet treats. With a handful of kitchen essentials, a bit of creativity, and some melting magic, you can whip up a fountain that dazzles and delights. So, next time you’re hosting a party or simply want to indulge yourself, remember that all it takes is a little chocolate and a touch of imagination. Enjoy the sweet moments, and happy dipping!