How to Make a Hot Chocolate Fountain for Winter Parties
Winter parties are the perfect opportunity to gather friends and family, cozy up, and indulge in delicious treats. One of the most delightful options you can present at your event is a hot chocolate fountain. Imagine a cascading flow of rich, velvety chocolate, paired with an array of dippables that will satisfy even the most discerning sweet tooth. Creating a hot chocolate fountain is not only a fun centerpiece but also an interactive experience that invites guests to customize their own treats. Let’s dive into how you can set up this festive feature at your next winter gathering!
Create the Ultimate Cozy Vibe with a Hot Chocolate Fountain
To kick off your winter party with a bang, you want to ensure that your hot chocolate fountain creates a warm and inviting atmosphere. Begin by choosing a cozy corner of your party space where the fountain will be the star of the show. Soft lighting, perhaps from fairy lights or candles, will enhance the ambiance and draw people towards the delicious chocolate cascade.
Next, think about the overall theme of your party. Adding winter-themed decorations, like pinecones, faux snow, and holiday garlands, can create a magical setting. Arrange comfortable seating nearby so guests can gather and enjoy their creations. A cozy blanket draped over a chair can also add a nice touch, making it the perfect spot for sipping hot chocolate and socializing.
Lastly, don’t forget the soundtrack! Soft holiday tunes or a playlist of your favorite winter songs can elevate the mood even further. With all these elements combined, your hot chocolate fountain will not only look inviting but will also set the stage for a memorable winter celebration.
Gather Your Supplies: What You’ll Need to Set Up
Now that you’ve envisioned the cozy atmosphere, it’s time to gather your supplies. First, you’ll need a quality chocolate fountain. These can be rented or purchased, but make sure to choose one that’s the right size for your party. Typically, a three-tier fountain can serve a good number of guests without overwhelming the table.
Next, you’ll need chocolate! Opt for high-quality melting chocolate or chocolate chips; dark, milk, or white chocolate are all great choices. If you’re feeling adventurous, consider adding flavored chocolate melts like caramel or mint. Don’t forget to check if you need any oil or cocoa butter to help the chocolate flow smoothly through the fountain.
Finally, prepare your dippables! Popular options include marshmallows, pretzel sticks, strawberries, bananas, and graham crackers. You can also think outside the box with cookies, cake pops, or even savory items like popcorn for a sweet-savory twist. Prepare serving platters or bowls to display your selection, and consider providing skewers for easy dipping!
Step-by-Step: How to Assemble Your Chocolate Fountain
Assemble your chocolate fountain with care, starting by placing it on a stable, level surface to avoid any spills. Follow the manufacturer’s instructions to ensure you set it up correctly. Most chocolate fountains have three main components: the base, the tower, and the tiers. Begin by placing the base on the table, then insert the tower and secure it as indicated.
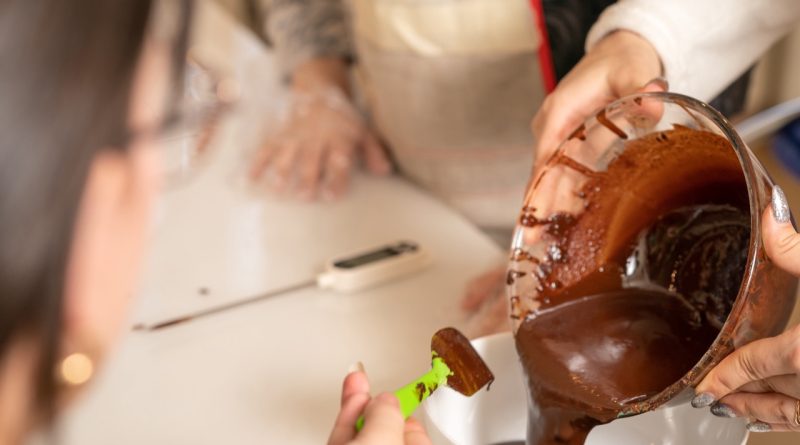
Next, melt your chosen chocolate. This is crucial for a smooth flow, so you can either use a microwave or a double boiler for this step. If using a microwave, heat in short intervals, stirring frequently until melted. Once the chocolate is smooth, pour it into the fountain’s basin, making sure not to overfill it. It’s better to start with less chocolate and add more as it flows.
Once everything is set, turn on the fountain to get the chocolate cascading down the tiers! Give it a moment to warm up and start flowing. It’s helpful to have some dippables ready to test the fountain and ensure that the consistency is just right. Now it’s time to invite your guests to the chocolate wonderland you’ve created!
Tips and Tricks for a Mess-Free Melty Experience
While a hot chocolate fountain is a delightful addition to any gathering, it can be a messy affair if you aren’t careful. To mitigate spills, lay down a protective tablecloth or some parchment paper around the fountain area. This will catch any drips and make cleanup a breeze after the fun is over.
Remember to keep a few paper towels nearby for quick fixes. If a guest accidentally spills chocolate or if the fountain gets a bit too messy, having these on hand can help you tackle any mishaps with ease. You may also want to designate someone as the "fountain overseer" to help keep the area tidy and assist guests, ensuring that everything runs smoothly.
Lastly, if you anticipate a large crowd, consider setting up multiple dipping stations with smaller fountains or extra bowls of melted chocolate. This way, guests can enjoy their treats without waiting too long in line. With a little planning and these tips, your hot chocolate fountain experience will be a melted, mess-free success!
Setting up a hot chocolate fountain for your winter party is a wonderful way to create a memorable and cozy atmosphere. Not only does it serve as an interactive dessert option, but it also brings people together, inspiring laughter, conversation, and creativity as they dip their favorite treats into flowing chocolate. By following these steps to assemble, decorate, and manage your fountain, you’re sure to have a deliciously successful gathering that will leave guests raving about the experience long after the last drop of chocolate has disappeared. So, gather your friends, pour some cocoa, and enjoy the sweet moments of winter together!